Saturday, August 29, 2009

Laugh Every Day


Playing with layers again...Love her smile, it's my favorite thing...ever...:-)

Friday, August 21, 2009

Remember Moments


So it's been awhile since I've played with pics just for the sake of playing with them, other than the class pics from below, yet this also falls into the category of using some of the techniques I learned in that online class using masks. I LOVE using masks! And layers. I was using layers before, but not so many at one shot. Now I have to watch myself that I don't overdo the technique! LOL!

Friday, August 07, 2009

Combining Days 1, 2, 3, and 5


Because I was bored last night, and really just wanted to "play," I used my favorite photo of my favorite granddaughter (and only) and combined the vintage, hand-tinted look, added a frame to it, and used three different textures, playing more with the opacity button on the textures, and added a couple of the new leaf brushes that I'd found. I really like the way this turned out. Then I added the text, where I was happy that I remembered how to "curve" my text! I think I'm hooked!!

Now I have to get going and move on to Day 6...TTV?? Hmm...guess I best get to crackin' to see what this is all about!! :-)

Jessica Sprague Digital Online Class - Day 5, Textures

Textures are fun! Textures are awesome! I've played with them before but never used more than one to texture a photo, much less three! Who knew!!

Using downloaded textures from Jessica's class, I used a film texture, grunge, and brown paper bag. I also desaturated the photo to give a more old-time look. Then used added on some text because she just looked like a dreamer here...:-)


Jessica Sprague Digital Online Class - Day 4, Clipping Masks

Day 4 was a tricky little bugger. Insofar as that PSP doesn't "clip" the way Photoshop does, so I have to go a'Googlin' to find an alternative method because from the instructions and examples that Jessica used, this just seemed WAY too cool not to try!

I did find some initial instructions from Designer Digitals but holy mackerel(!) it was a complicated mess! I did finally achieve a clipping mask, but oddly enough (or not, I may have messed up along the way) I couldn't seem to duplicate my efforts with the same consistency.
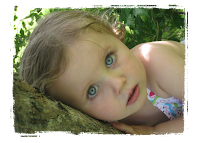


And yes, I used the same photo as in Lesson 4. ;-)
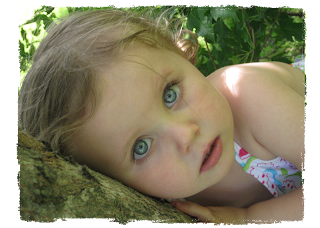


So I went searching again, and found this, by a poster named "chantillylace," which seemed a better, MUCH less complicated method to simulate the desired effect, using the materials/texture palette and flood fill. It did alter the overall look of the mask somewhat, but it's still effective.


Meanwhile, while playing with the layers and masks and what-not, I accidentally created the image I was looking for, only wasn't sure how I did it!! Fortunately I was able to do it twice. UNfortunately. I didn't know how I got it the second time either! So I worked backwards, using the "undo" button (thank you whoever created this most important feature in programs), and figured it out...eventually...

For anyone using PSP and wanting to use the clipping mask technique, this is how I did mine:

Open up both the photo and mask images.
Layer the mask over the photo.
Right click on the mask.
Click on: "New mask layer"
Click on: "From image"
Make sure the photo name OF your mask is in the source window.
Check the button for "source opacity."
Click: OK
Duplicate the photo you're using.
Delete the original, or hide it.
Move the photo to the bottom layer of your "Group."
Delete the original mask, or hide it.
Voila'!!!
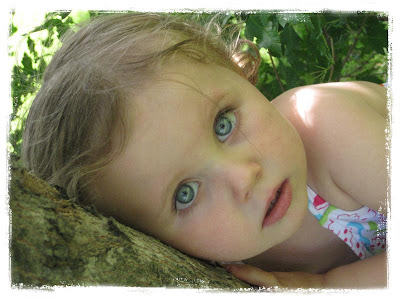

You have your clipped mask! I'm sure there is some fine-tuning that could be done to the photo/mask/etc, but I was just thrilled to be able to DO it at all! LOL!


Jessica Sprague Digital Online Class - Day 3, Create a Vintage, Hand-tinted Look

I think Day 3 has been my favorite so far. I love the vintage look this technique brings, and the depth it brings to the image. Added hand-tinting just adds to the wonderful overall vintage feel to the photo.


The first photo is one sent to me by Ava's Momma. It was just begging to be played with (the photo, not Ava, though she begs to be played with too...LOL) I used Jessica's techniques with no problem in PSP. Both programs are very similar in how they name/describe their tools and uses, though the tools are in different locations so I usually had to go looking for the right one! Which was good, actually. Made me explore my own program a bit more thoroughly than I normally would have.


The second photo is just a zoomed-in version of the one above, just because I could...;) and softened for a more dreamy effect.


Jessica Sprague Digital Online Class - Day 2, Brushes

Day 2 was working with Brushes, something I'd only tinkered around with in PSP previously. I did learn how to resize the brushes as a result of having to work with brushes for this class, and I found several cool new brushes and figured out how to install them into my program, so now I'm all set for playing with brushes in the future! And have a new pastime as I search for more brushes to use in future projects! :-)

I did use the brush that Jessica provided with the class, just to keep things simple for now, but I played around with the color to better match it to the subject (again, my favorite little girl in the whole wide world...:-) And I added some "paint splatters." I also added a frame about this photo because it seemed like it was lacking...

Jessica Sprague Digital Online Class - Day 1, PNG Frames and Word Art

Okay, it's been ages since I've posted on my blog, so thought I'd post some of the results from an online digital class I've been taking from Jessica Sprague. I've learned TONS so far from her instruction and am not even done with the course yet! As an added challenge, while she uses Photoshop in her directions, I have only Paint Shop Pro Photo X2, so I have to translate instructions from the one program into mine! So far I've been able to figure it all out, but not without some mild frustration. ;) Like I said, just adds to the challenge! LOL!

Day 1 - PNG Frames and Word Art

This was fairly simple as I've done similar steps before in PSP or in my Creative Memories program, StoryBook Creator 2. I've used a photo of my favorite subject, of course!! :-)

I did learn how to resize a photo to a specific size a whole lot easier than the way I had been doing it!